Using Waste Yarn to Create Openings in Knitting
Using Waste Yarn to Create Openings in Knitting
If you're working on a pattern that calls for binding off stitches or placing them on a stitch holder to be picked up later, why not try this waste yarn technique
Learn how to add seamless and more functional openings to your knitting projects with waste yarn! This versatile technique is great for creating openings for sweater pockets, mitten thumbs, sock heels, and armholes for dog sweaters. It provides a more flexible and comfortable finish compared to binding off.
Interested in learning how to knit custom-fit dog wear?
Get started by downloading my free workbook to learn how to measure your dog.
Step-by-Step Guide:
Preparation
- Choose a set of double-pointed needles that are slightly smaller than the needle you have been knitting with. You'll need these when you pick up the stitches to knit them later on.
- Select a piece of waste yarn in a contrasting color to your working yarn so it's easy to see.
- Continuing to work with your regular needles, knit your garment to the point where you want to place the opening.
Start Knitting
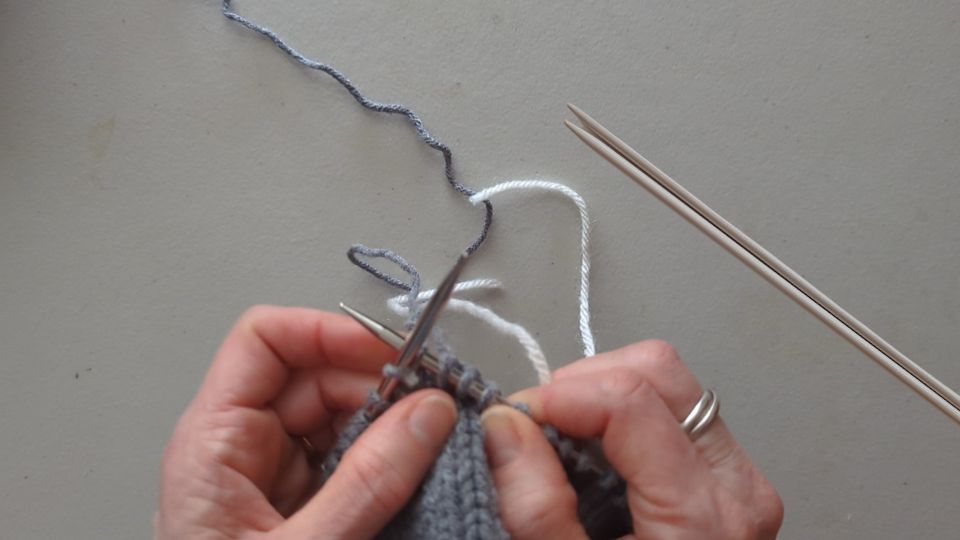
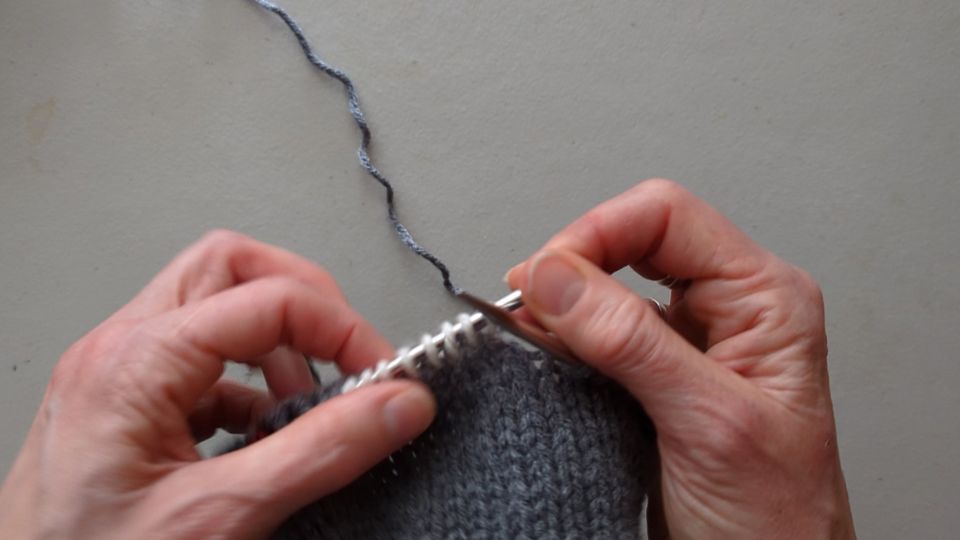
- Insert your right needle into the left-hand needle as you would for a normal knit stitch.
- Make a loop with your contrasting waste yarn and slip it over the right-hand needle.
- Draw the loop through to pull up a stitch.
Knit the required stitches
- Knit the required number of stitches that your pattern suggests for the opening. For example, if you are asked to bind off eight stitches, knit eight stitches instead.
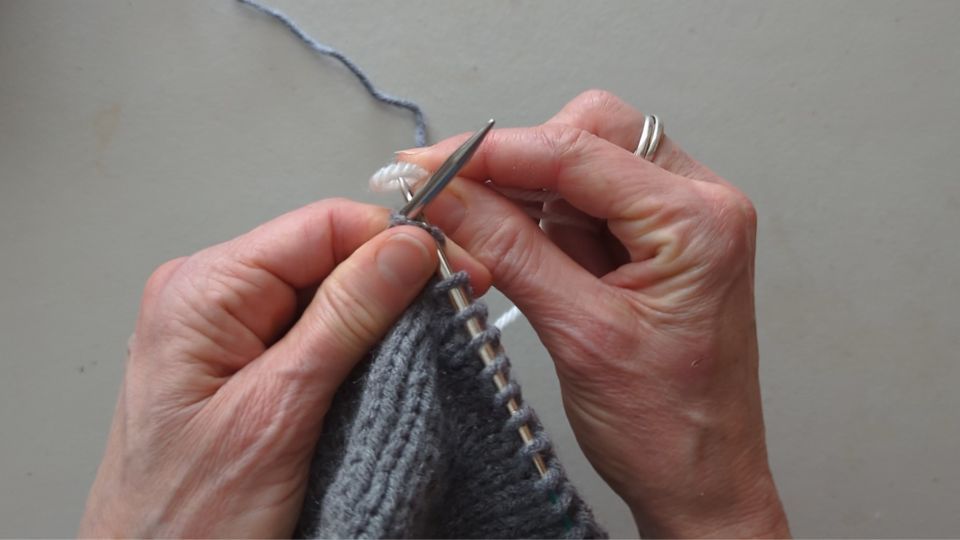
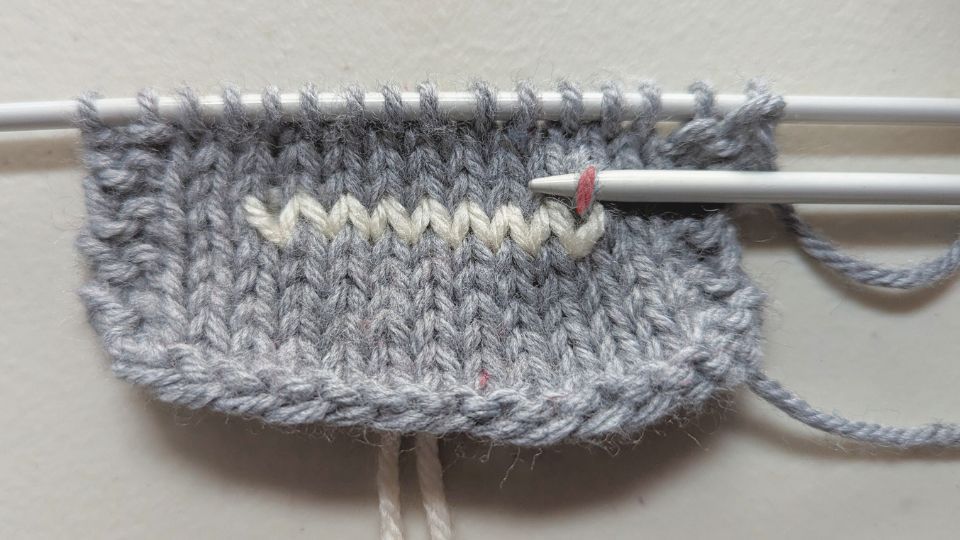
Tie off the waste yarn
- Tie a bow or knot in the back with the waste yarn ends to keep them out of the way.
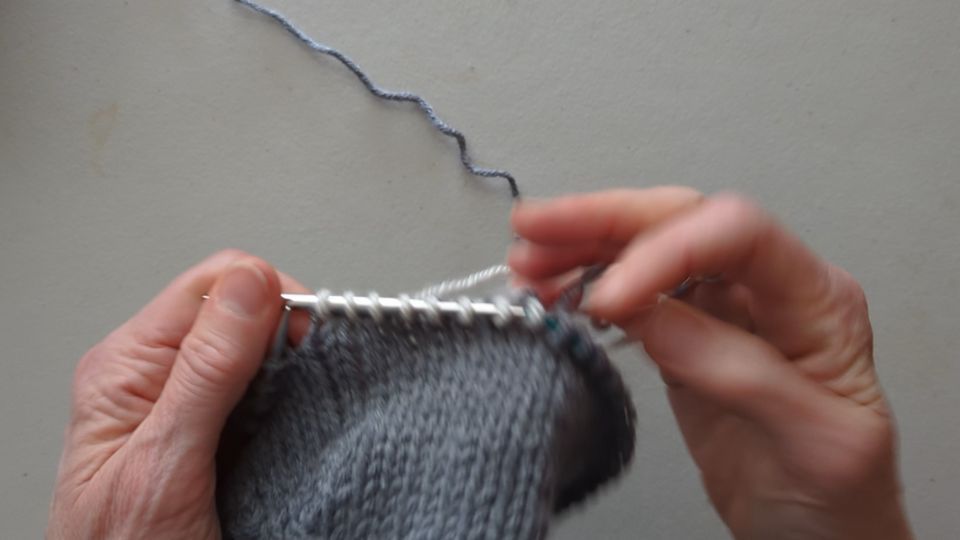
Transfer the stitches back
- Transfer all the waste yarn stitches back onto the left needle.
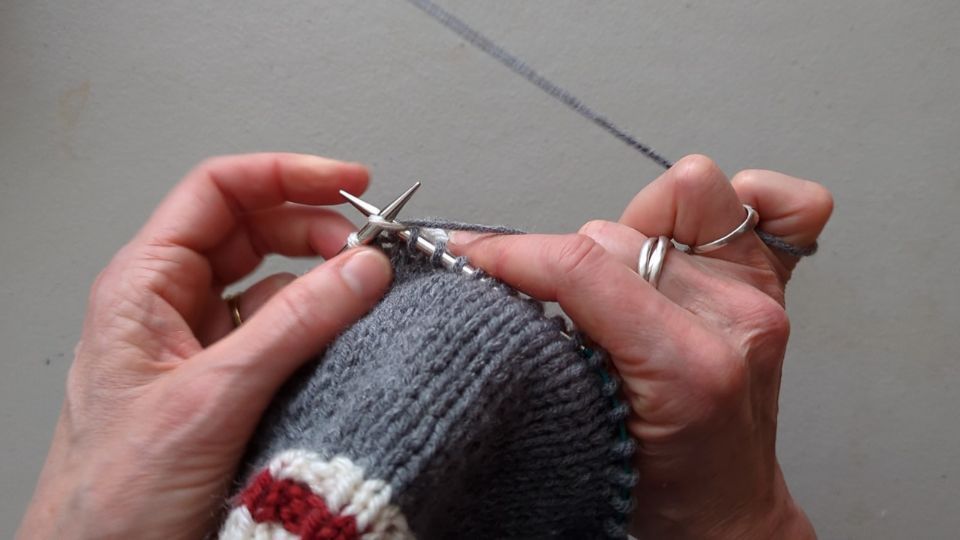
Knit the stitches
- Knit all the waste yarn stitches with your regular yarn.
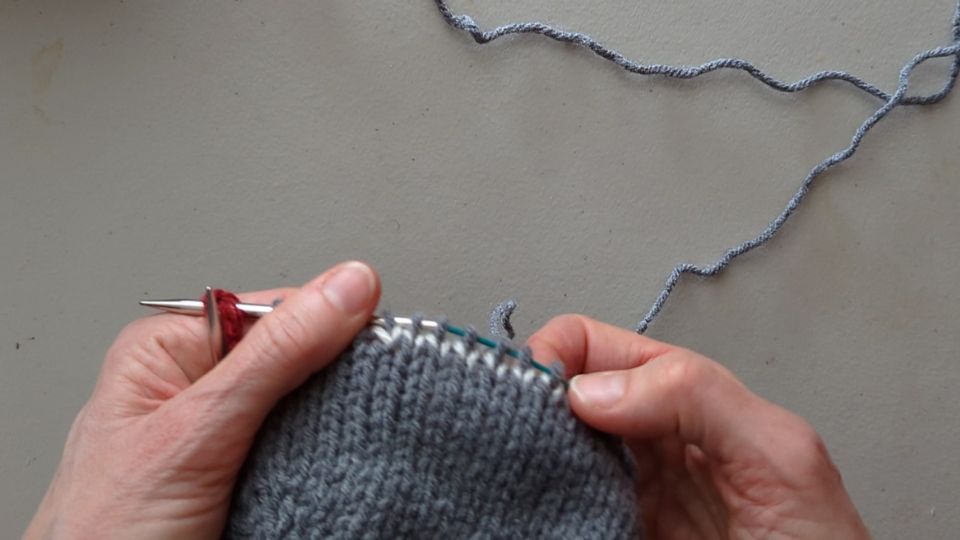
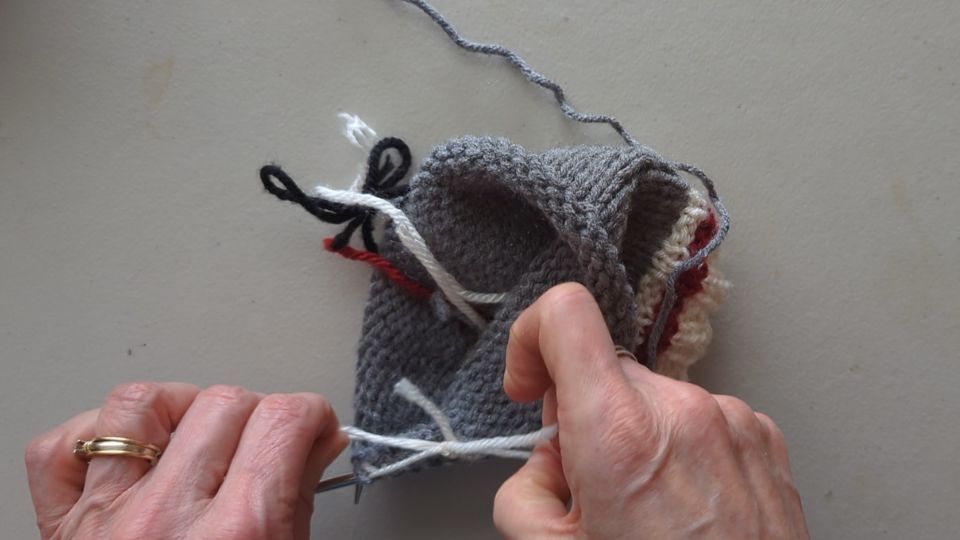
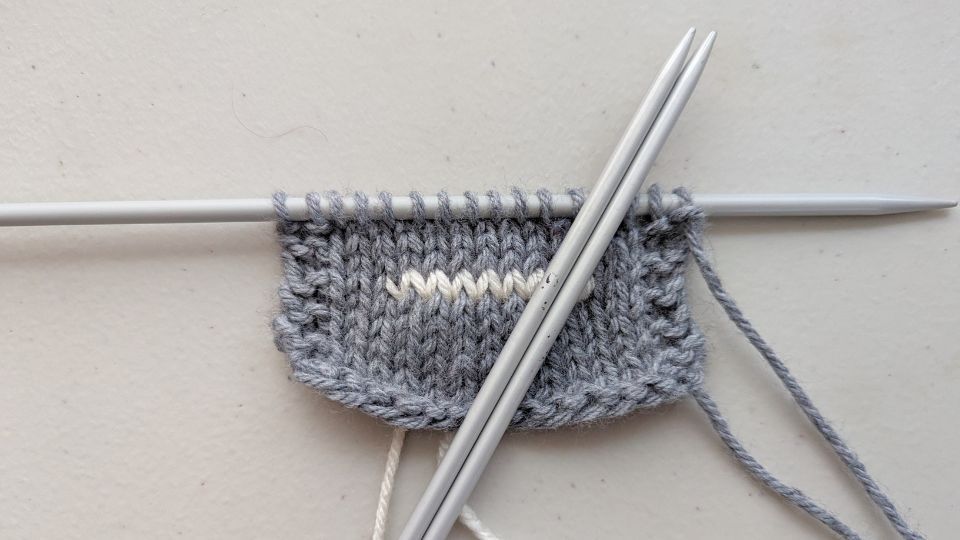
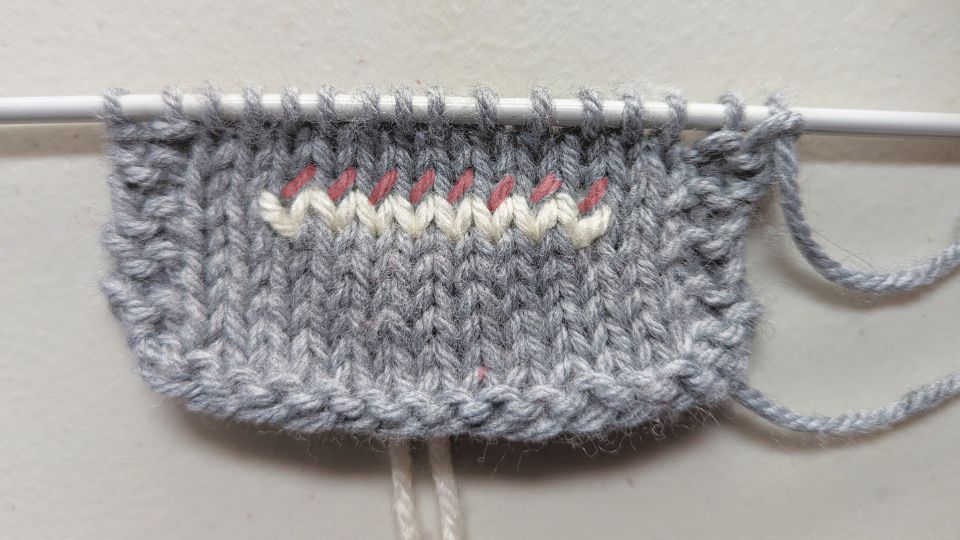
Final waste yarn stitches
- In the end, you will have a knitted section in a different color that you can go back and pick up later.
- Continue to knit the rest of your pattern until you reach the point where you need to pick up those stitches again.
Get the double pointed needles
- Now we're going to use those double-pointed needles to pick up and work the stitches that we've held with the waste yarn.
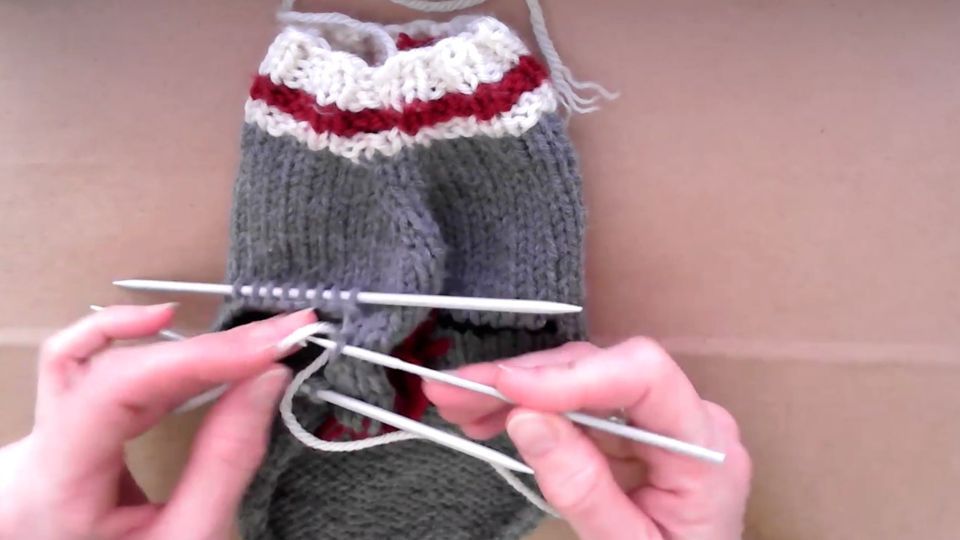
Pick up the top stitches
- First, you'll pick up the right leg of each stitch above your waste yarn stitches (aren't you glad you used a contrasting colored yarn now?).
- Insert the point of your double-pointed needle into the first right leg of the stitch on the right side of your work (as shown here).
- Continue to pick up all the stitches above your waste yarn onto the same needle (highlighted in red).

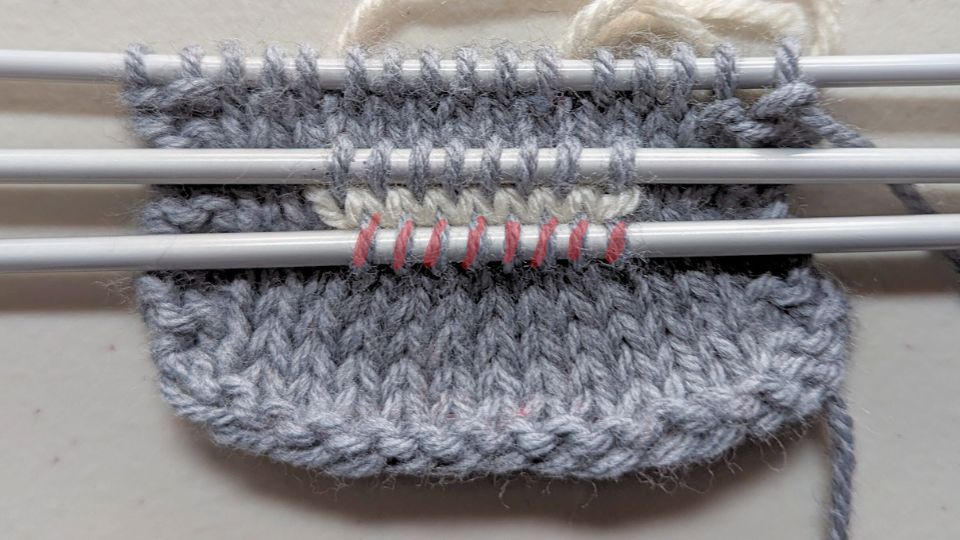
Pick up the bottom stitches
- Now that you have all the stitches picked up on your top needle, it's time to pick up the bottom stitches.
- Insert the point of the second double-pointed needle into the stitch directly below the waste yarn stitches.
- Continue to pick up all of the stitches below your waste yarn onto the same needle (as hishlighted in red here). .
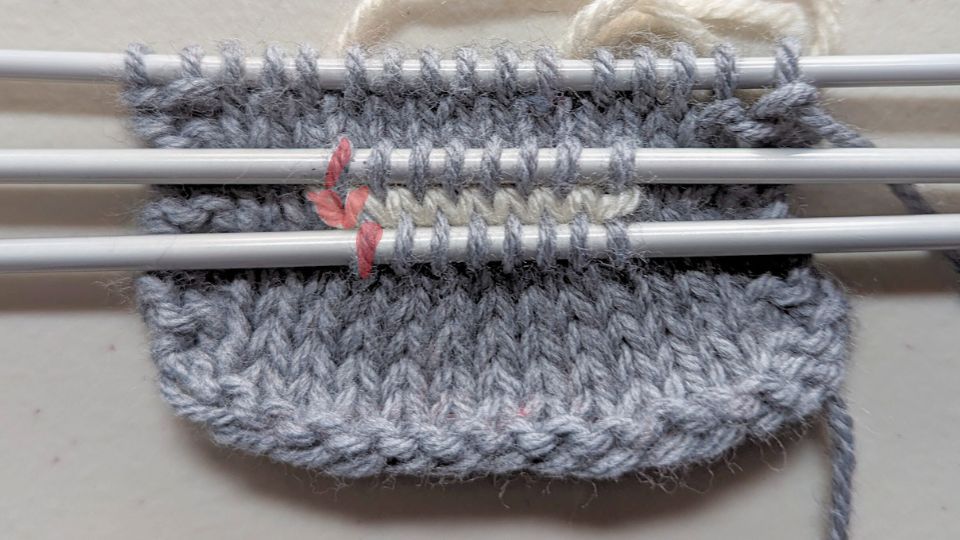
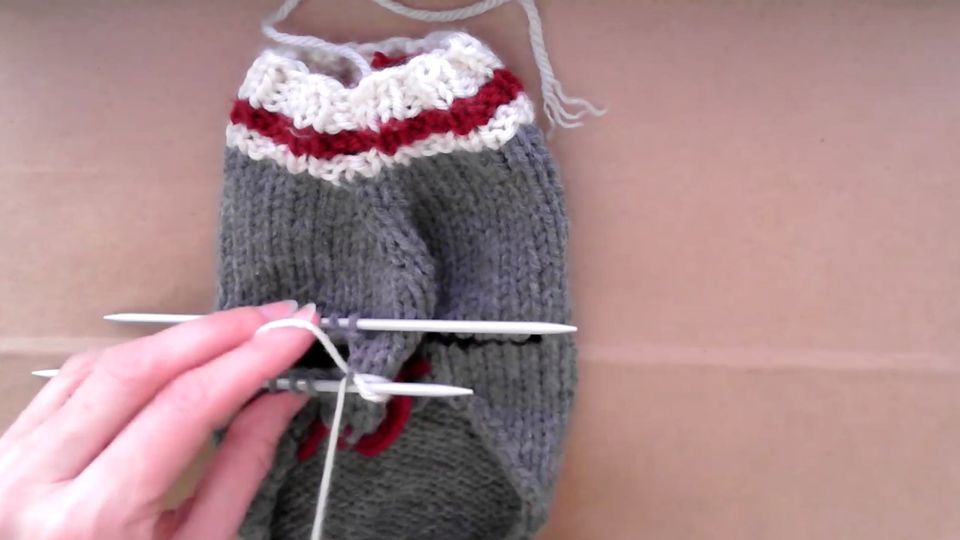
Check your stitches
- Double-check that you have picked up all the stitches you need and ensure you have the right leg directly above and below the V of the waste yarn stitch (as highlighted here in red).

Remove the waste yarn
- Carefully remove the waste yarn using a tapestry needle or your double-pointed needle.
- Double-check that you've captured all the live stitches, particularly those at the end of the needles.
Pick up a gap stitch
- Pick up a stitch on the right side in the gap area between the upper and lower needles. This helps to create a more rounded opening.
- Slip the stitch onto the bottom needle and then knit across the stitches on that needle.
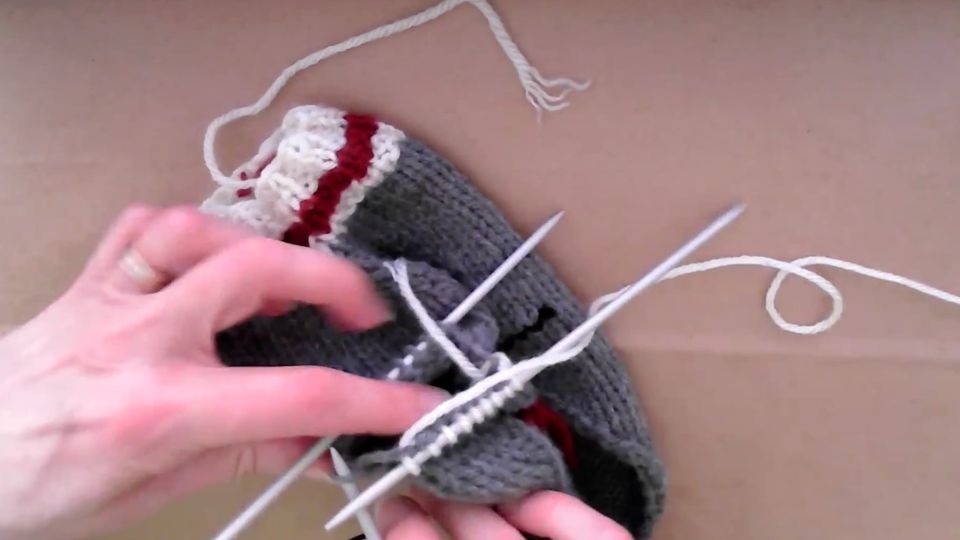
Pick up another gap stitch
- Pick up another stitch in the gap area between the lower and upper needles.
- Slip the stitch onto the top needle and then knit across all the stitches on that needle.
- And that's it! Just continue to knit the rest of your garment according to your pattern.
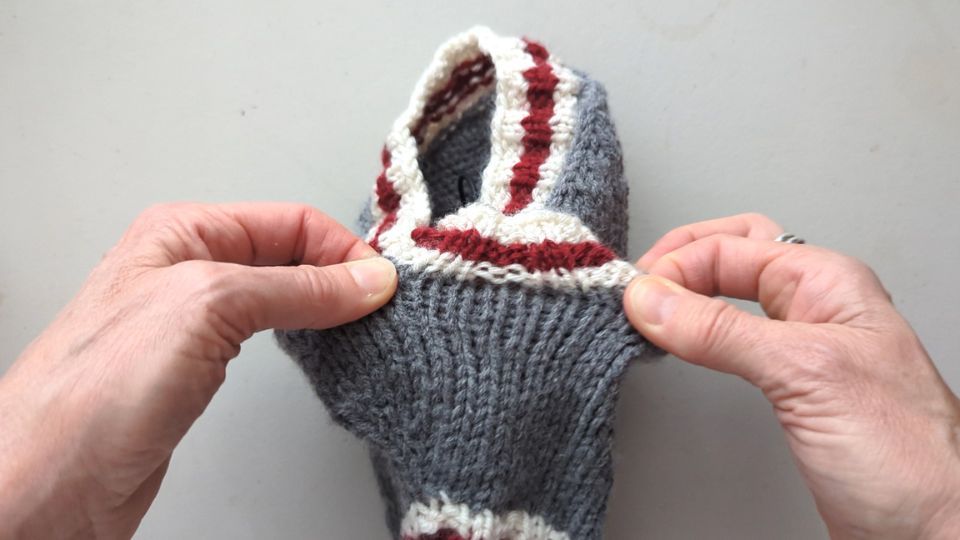
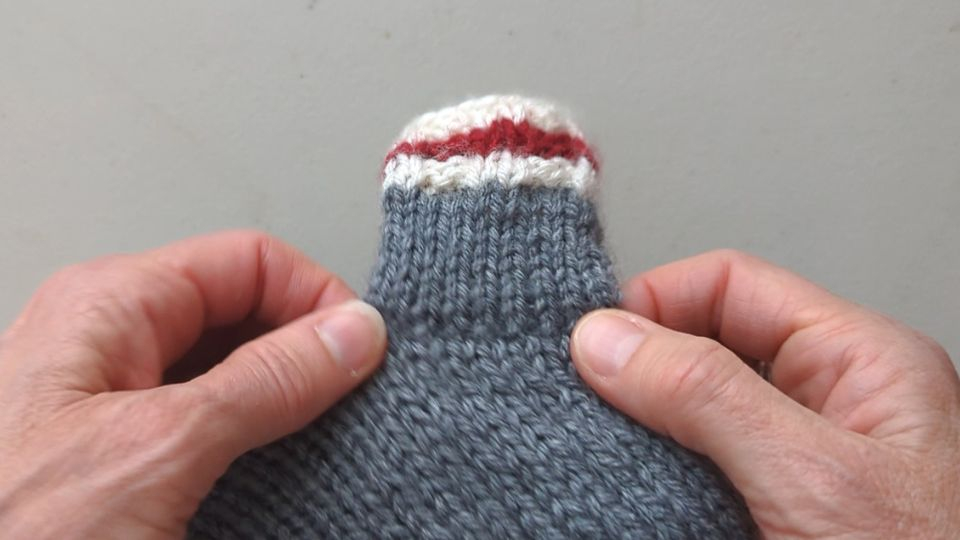
Stretchy, seamless finish
- In the end, you will have a completely seamless and stretchy opening.
- Compare this to the leg opening below that has been bound off. You can see an obvious join seam, and it isn't nearly as stretchy.
This method of using waste yarn to create openings is simple yet effective, providing flexibility and a professional finish to your knitting projects. Whether you're making armholes for a dog sweater or thumb openings for mittens, this technique ensures clean, well-defined openings that are easy to work with.
If you're interested in learning how to knit custom-fit dog wear, download my free workbook to discover how to measure your dog for the perfect size pattern. All my patterns include instructions on how to customize them for the ideal fit.
If you're interested in learning how to knit custom-fit dog wear, download my free workbook to discover how to measure your dog for the perfect size pattern. All my patterns include instructions on how to customize them for the ideal fit.
